Quantcast
Channel: Chickettes Natural Nail Studio & Boutique
Viewing all 441 articles
Browse latest View live

VIDEO: The Painted Nail Steam-Off Gel Removal System Review

$
0
0

steam-off-gel-removal-review

Introducing the latest in nail technology… Steam Off Gel Removal by The Painted Nail.  Many of you have asked for a review of this product, so I purchased one and have been testing it over the last few weeks.  I did a full video review with a demo, which you can watch below.


The kit includes:

  • Steam Off Gel Removal System
  • Power adapter
  • 4 oz bottle of bubble-scented gel remover
  • Orangwood stick
  • Instruction booklet

How it works:

  • File the top coat off of your nails with a coarse grit nail file.  Basically you have to break the seal, just as with a regular soak-off.
  • Plug in in the system.
  • Remove the lid, turn the finger cap to the open position and remove it.
  • Pour 5ml of the remover or acetone into the reservoir. There is a small plastic container with a line that has a 5ml marking so you know how much to pour in.
  • Replace the finger cap.
  • Turn the switch to ON.
  • Wait until you hear a beep.  This means the system is warmed up and ready to steam.
  • Place all five fingers into the finger cap.
  • Steam.  The steamer will beep twice at the 5 minute mark, and then there will be one long beep at the 10 minute mark.
  • Use the orangewood stick to remove the flaking polish.  If the polish is not loose, continue steaming.

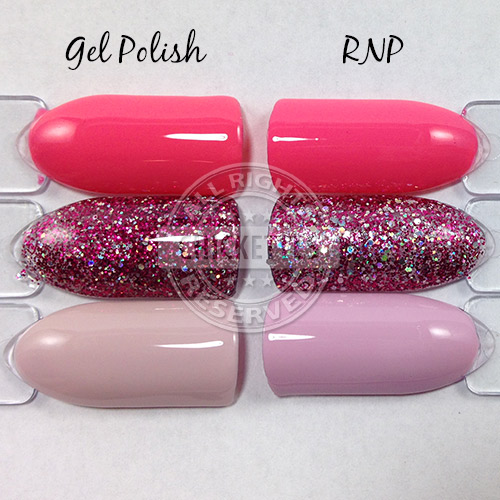
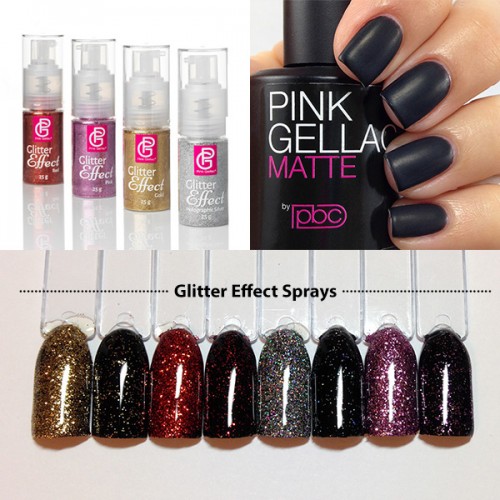
I’ve tested a few different brands of gel polish with this system so far: Gelish, CND Shellac, Pink Gellac and Couture.  Pink Gellac and Couture both removed very easily, as you will see in the video demonstration.  Gelish and CND Shellac took about 15 minutes total.  Basically the unit warms up the acetone liquid and turns it into a vapor, and the heat and vapor combination cause the polish to soften and lift.

I had a very bad experience the very first time I used this steam-off system.  I was removing the Pink Gellac Luxury Gold glitter polish with a Gelish base after my vacation and I ended up with a LOT of damage done to my nails.  As I’m sure you can understand, my nails take a lot of abuse from trying so many different products for this blog so there was some existing damage prior to this soak-off.  I had been doing IBX treatments on my nails regularly and they seemed to be in pretty good shape before this removal… but this is what they looked like after 15 minutes or so of steaming. YIKES, right?!

steam-off-1I was really upset about the state of my nails as I’m sure you can imagine.  The top layers seemed to be just peeling right off.  After getting the remaining polish off, I filed them down, took a buffer to them and then did another IBX treatment (that’s a topic for another day), and they looked much better.  I was really hesitant to use the steam-off again, but I knew I had to take one for the team so that I could report it all back to you.
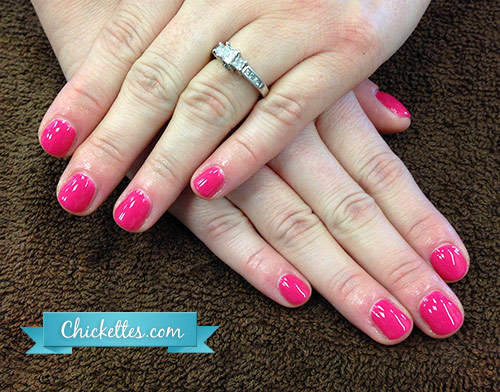
  ;)  Below is what my nails looked like after the second removal.  Much, much better!  This was after removal of a Couture gel manicure, which generally soaks off pretty easily for me using the traditional method.  This steam-off took less than 10 minutes.

steam-off-2I’ve used the steam-off system a few other times since and have not had the issue of damage again, so I’m really glad I stuck it out and gave it another shot.  It seemed during that first experience that the heat and vapors softened my nail beds and really highlighted the existing damage.  I think that in the end my nails are healthier now that I’ve been able to buff away the damaged top layer.

Due to my experience, I’m hesitant to say whether I recommend this product or not.  I’m going to list some of the pros and cons and let you decide for yourself if it’s a worthwhile investment.

Pros:

  • It works as stated.  Most gels steam-off in 10-15 minutes, which is comparable to traditional soak-offs.
  • The system is lightweight, portable and easy to clean.
  • Steaming is a more pleasant experience than soaking because of the warmth.
  • Steaming is less drying and harsh on your skin and nails.

Cons:

  • Since it’s a one-hand system you can only remove the polish from one hand at a time, unless you purchase two units.  This is essentially doubling the removal time.
  • You can’t multi-task while steaming since your hand has to remain in the system.
  • It’s essentially warming up the acetone and creating vapors which may become airborne.  While most of it is contained within the system, I’m not sure that it’s healthy to be breathing in these vapors.  There is a warning that comes in the box that says “breathing large amounts may be harmful”.
  • It’s rather expensive at $99.99/unit.

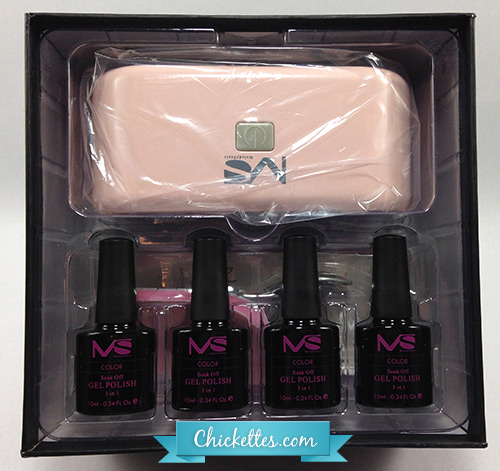
The Steam-Off Gel Removal System can be purchased from www.everythingnailz.com.  I also purchased the swatch strips and will be testing those out soon!

So what are your thoughts on the steam-off removal?  Will you, or did you buy it?


Preview of Gelish and Morgan Taylor Cinderella 2015 Collections

$
0
0

Gelish & Morgan Taylor Cinderella 2015 Collections by Chickettes.com

Gelish and Morgan Taylor have collaborated with Disney and are releasing limited edition Cinderella collections inspired by Disney’s live-action movie, Cinderella.  The movie will open in theaters on March 13th, and the Gelish and Morgan Taylor Cinderella collections will be available for a limited time beginning in February.

Both collections consist of six colors.  Five of the six colors match, and the sixth color is individual to each brand.  Morgan Taylor will also release three duo sets and new Morgan Taylor MINI’s.  Gelish will release three new Trends toppers and Two-of-a-Kind duo packs with the five matching Morgan Taylor shades.

These are the six new Gelish Cinderella colors:

Gelish Cinderella 2015 Collection by Chickettes.comAnd these are the three new Gelish Trends toppers:

Gelish Cinderella Trends toppers by Chickettes.com

These are the six new Morgan Taylor Cinderella colors.  You can see that the first five are the same, and the sixth color is unique to the brand.

Morgan Taylor Cinderella 2015 Collection by Chickettes.com

This is just a teaser… I will have a full review with swatches and color comparisons soon!

Morgan Taylor products are available for purchase at www.morgantaylorlacquer.com.
Gelish MINI products are available for purchase at www.sallybeauty.com.

I Can’t Live Without – Nail It! Feature & GIVEAWAY!

$
0
0

chickettes-i-cant-live-without-giveaway

I had the honor of being featured in Nail It! Magazine where I highlighted some of the products that “I Can’t Live Without“, and answered a few questions. I wanted to share the love with my readers and provide you with an opportunity to win all of the items that were included in the article! Below is a picture of the magazine article… it’s on page 60 in the January/February 2015 issue (click the image to see a larger view).

chickettes-nail-it-magazine-article-jan2015

I Can’t Live Without…

These are my some of my favorite items:

nail-mates-removal-6NailMates (www.nailmates.net): Ever since I reviewed NailMates last year, these have been my go-to product for gel polish removal! I will never use the foil method again. NailMates are so easy to use, are drip-free, and they can be cleaned and re-used time and time again! (Read my full review here).  NailMates has donated a set for each winner of the giveaway!

curad-alcohol-prep-padsCurad Alcohol Prep Pads: I use alcohol prep pads/wipes for all of my cleansing during nail prep, and post-mani clean-ups. I go through tons of these wipes, and if you’ve watched any of my videos I’m sure you’ve seen them. I find these so much easier to use than liquid cleansers.  They can be purchased at most drug stores in the first-aid section.

gelish-miniGelish LED Lamp (www.getgelished.com or www.sallybeauty.com): The Gelish 18G is my go-to lamp, as most of you know. Since it’s a pro lamp and Nail It! is a DIY magazine, they recommended the Gelish MINI Pro 45 LED lamp instead and added a little disclaimer that says “Beight love the pro-only Gelish 18G Professional LED Light”.  Gelish MINI has graciously donated a MINI Pro 45 LED lamp and two Basix Kits for this giveaway!

girly-bits-giveaway-kitFrazzle Fixer Cuticle Oil (www.girlybitscosmetics.com): People always ask what I do to keep the skin around my nails healthy with all of the polish changes that I do, and the answer is cuticle oil! I use tons of it! Girly Bits Frazzle Fixer in Sangria Scent is one of my favorites.  Pam at Girly Bits put together the cutest little kits for this giveaway with some decorative boxes!  Click on the picture to the right to enlarge.

The GIVEAWAY!

1st Prize:

  • Gelish MINI Pro 45 LED Lamp
  • Gelish MINI Basix Kit, containing pH Bond, Foundation, Top It Off, Nourish, Cleanser & Remover
  • Set of NailMates, containing 10 caps and 20 pads (re-useable)
  • Girly Bits gift box, containing Stick With Me Base Coat, What a Rush Top Coat, one nail polish color, & Frazzle Fixer Cuticle Oil
  • Box of Curad Alcohol Prep Pads

2nd Prize:

  • Gelish MINI Basix Kit, containing pH Bond, Foundation, Top It Off, Nourish, Cleanser & Remover
  • Set of NailMates, containing 10 caps and 20 pads (re-useable)
  • Girly Bits gift box, containing Stick With Me Base Coat, What a Rush Top Coat, one nail polish color, & Frazzle Fixer Cuticle Oil
  • Box of Curad Alcohol Prep Pads

3rd Prize:

  • Set of NailMates, containing 10 caps and 20 pads (re-useable)
  • Girly Bits gift box, containing Stick With Me Base Coat, What a Rush Top Coat, one nail polish color, & Frazzle Fixer Cuticle Oil
  • Box of Curad Alcohol Prep Pads


RULES:

  • The giveaway will run through January 31, 2015.
  • Entries will be collected via Rafflecopter only.
  • The winners will be selected randomly via Rafflecopter and announced on February 1, 2015.
  • The winners will be notified via email, and will have 48 hours to claim the prizes or new winners will be selected.
  • This giveaway is open INTERNATIONALLY.  Everyone can enter!
  • Entries will be verified.

ENTRY FORM:

a Rafflecopter giveaway

If for any reason the widget above will not display, please visit this page to enter the giveaway.

This giveaway is sponsored by Gelish MINI, Girly Bits Cosmetics, NailMates and Chickettes.

Gel Polish Colors in Marsala- Pantone Color of the Year 2015

$
0
0

Gel polish colors in "Marsala" - Chickettes.com

Pantone’s Color of the Year for 2015 is Marsala. “A naturally robust and earthy wine red, Marsala enriches our minds, bodies and souls.”  I have to admit that I wasn’t overly excited about this color choice when it was first announced, and was hoping for something more bold.  But there are some very pretty gel polish colors that fit into the Marsala family, and they’re great shades for winter!  These are a few that I found while I was looking through my collection that I thought fit the bill.

The top color is Pink Gellac Mystic, which has just recently been added to the Chickettes Boutique.  The bottom row consists of three Gelish colors. From left to right, they are:

FYI – the last two colors aren’t matte, they are shiny… my old lighting setup muted the shine.

What other Marsala gel polish colors do you know of?  Feel free to share in the comments below.  :)

Video Review: MelodySusie Violetina 2-in-1 Nail Lamp (36 watt UV & 24 watt LED)

$
0
0

I conducted a video review of a new MelodySusie 2-in-1 nail lamp, which you can watch above.  This lamp is almost identical to the 36-watt MelodySusie UV lamp that I reviewed not long ago (see that review here), but the major difference is that this lamp comes with two types of bulbs.  It comes with four 9-watt UV bulbs and four 6-watt LED bulbs, so it functions as a 36 watt UV lamp or a 24 watt LED lamp depending on the type of bulb that you install.

I think most people would love to have a lamp that can function as LED or UV so that you can cure any type of polish or nail treatment.  This lamp unfortunately has one flaw, and that is the timer settings.  It has settings for 120 seconds, continual use, or 180 seconds… ideal settings for UV usage, but not for LED.  The major advantage of using an LED lamp is the faster curing time.  Most LED polishes will cure in 30 to 60 seconds (always read the labels!).  So if you want to use this lamp in LED mode, you have to manually time the cure and turn the lamp off.  Kind of a bummer.

I mentioned this drawback to the MelodySusie reps and they are going to make a correction so that this lamp functions well in both modes.  In the meantime, this lamp in its current state is more ideal for someone that wants a UV lamp and may want occasional LED usage.

This lamp is currently on sale for $69.99 at Amazon.com.  See it here.

Cuccio Swatches: Fountains of Versailles & Moscow Red Square

$
0
0

I have a couple of quick Cuccio Color Veneer gel polish swatches from my untried stash today.  This is only my second time trying this brand.  The formula of these two polishes was good… no shrinking or pooling, but it did take three coats to get full coverage.  The colors are absolutely gorgeous though, so I didn’t mind applying three coats.  The Cuccio gels are available in Matchmaker sets that come with a matching regular nail lacquer.

Fountains of Versailles is an absolutely gorgeous shimmery teal blue. This color just steals my breath away… I’m such a sucker for teals.  Even with three coats there was a tiny bit of visible nail line in certain lights, but it’s not noticeable in the photos that I took.  Love, love, love this color.
Cuccio Fountains of Versailles swatch by Chickettes.comMoscow Red Square is a raspberry-leaning red with a subtle frosty shimmer.  After looking at the previous swatch, the shimmer in this seems a little flat, but it’s very pretty in person.  The shimmer seems to have some pinkish tones to it.
Cuccio Moscow Red Square swatch by Chickettes.comI also purchased the Cuccio base and top coats and tried them once.  The top coat was decent, but I didn’t think there was anything special about it that made it stand out from the crowd.  The base unfortunately didn’t hold for me, and I had lifting within two days.

Since this is a fairly new-to-me brand, I’d love to hear your thoughts and experiences with it.  Please feel free to share in the comments!  :)

UberChic Beauty Stamping Plates, Glitter Dust & Magic Dust

$
0
0

UberChic Beauty Stamping Plates, Glitter Dust & Magic DustThere’s a new stamping plate creator in town… UberChic Beauty!  The owner, Brittany, contacted me a while back during the research phase to gather some input on stamping plate preferences and I provided her with some feedback.  She was also a long-time stamping plate user and we shared many of the same thoughts on the plates in the market.  I’m sure she did her homework and spoke with many others too, because the end results are fabulous!

UberChic Beauty stamping plates are designed to be trendy, cost-effective, and large enough to work on longer and/or wider nails without the images being too overwhelming on smaller nails as well.  I have small nails and many of the images on other jumbo plates don’t translate well.  The UberChic images are designed to work well for most nail shapes and sizes.  Here are some of the UberChic plate specs:

  • The image plates are 9.5 x 14.5 cm.  Each plate has several full nail patterns, with some coordinating single images down the center of the plate.
  • The full nail designs are 17 x 21 mm.
  • The plates have a PVC sticker backing to prevent you from getting cut.
  • Pricing:  The plates are sold in sets of 3 for $24.99 with flat rate shipping of $5.99 in the U.S. and $15 internationally.

I didn’t test every single design on the plates, but I tested many and the images all transferred really well.  And as promised, most of the designs worked really well on my small nails.  Below is a photo of the 6 plates that are currently available. I’m horrible at photographing stamping plates because of the reflective surface, but you can view the full specs and images on these plates here on the UberChic website.

UberChic Beauty stamping plates, sold in sets of 3UberChic also sells Glitter Dust and Magic Dust.  Glitter Dust is ultrafine loose glitter that you can scrub into the tacky layer of your gel polish for some added sparkle.  There are some really pretty, bright, bold colors available. There are also a few that are iridescent that create different effects depending on the base colors that you apply them over.  There are four products called Magic Dust too, which appear to be iridescent pigment powders.  These also take on different colors depending on the base color.  Magic Dust is a great way to liven up a polish color, as you’ll see in the upcoming photos.

UberChic Glitter Dust & Magic DustWith all of these goodies on hand, I had to play around and come up with a cool design!  I decided to start with a color changing polish, and I opted for a Gel II Reaction gel called Champaign Fizz.  This color changes from a deep raspberry pink when cold, to a very pale light pink when warm as you can see below.

Gel II Champaign Fizz - Reaction Gel - Color Changing Mood Gel PolishThe name Champaign Fizz made me yearn for something sparkly.  I really expected that color to have some shimmer or something… nope.  So I wondered what would happen if I scrubbed some of my UberChic Mad Hatter Magic Dust into the tacky layer of this polish.  The result was amazing!  This Magic Dust has a purple iridescence to it that completely transformed the original color.

Gel II Champaign Fizz Reaction Gel with UberChic Mad Hatter Magic DustThis is a quick peek at the inside of the Magic Dust jar.  I was very confused after I unscrewed the lid… there was another lid.  LOL  I must not be the sharpest tool in the shed because I spent about 5 minutes trying to open this little jar.  See the little leaf on the white lid?  Yea, you just pull on that and it opens right up!

UberChic Magic Dust But that’s not the end of my nail creation!  I had to also add a stamp of course.  I mulled over the UberChic plates trying to decide on just one image… very hard!  I finally opted for this simplistic image from plate 1-03 that looks a bit like dripping paint, and created a funky French manicure.  I used a dark blue stamping polish from Mundo de Unas to contrast with the pinkish-purple base.

Chickettes.com funky stamped French manicureThe photo above is what the design looks like when my hands are cold, and here’s what it looks like when they are warm.  My middle finger seems to be a little cooler than the others in this picture…

Chickettes.com stamped French manicureOverall, I’m very impressed with the stamping plates and other products that UberChic has launched with.  I can’t wait to see what other types of stamping plate designs they come out with in the future!  Visit UberChic Beauty at www.uberchicbeauty.com

Gelish Cinderella Collection Swatches & Color Comparisons

$
0
0

 
Gelish Cinderella Collection Swatches & Color Comparisons at Chickettes.comI previously posted a sneak peek of the new Gelish and Morgan Taylor Cinderella Collection colors that are coming out in February, and today I have the full color swatches and comparisons of the Gelish shades. The Gelish Cinderella Collection consists of 6 colors and 3 Trends glitter toppers.  I know that you all love to see how the colors compare to existing shades in the Gelish line, so I am combining everything into one BIG post. This is going to be a very long, and graphic-heavy post!  Are you ready?

Gelish MINI colors can be purchased at Sally Beauty Supply online at www.sallybeauty.com, or in retail stores. You can also purchase directly from the Gelish MINI website at www.getgelished.com!

Each of the color swatches below shows three coats of color on my natural nails. My nails are short again due to another break (I’m still blaming the cold weather). The formula of the colors was a little inconsistent. Most of them applied a little streaky, which is why I ended up using three coats to get full coverage. Each of the Trends glitter toppers are shown with two coats over my natural nails.

Party at the Palace is a minty teal blue with a beautiful shimmer finish.  This color starts off very sheer, but it builds up to opacity.  You can see that after three coats I still have a little visible nail line.  Party at the Palace is available in a Two-of-a-Kind set with a matching Morgan Taylor shade.

Gelish Cinderella Collection - Party at the Palace - swatch by Chickettes.comHere is a picture of Party at the Palace next to some other shimmery teals.  It’s not quite as sheer as Oocha Coocha.

Gelish Cinderella Collection - Party at the Palace - swatch by Chickettes.comDuring my fade test this color actually changed a little.  With exposure to natural sunlight the color turned slightly more yellow/green.  It was hard to capture in a photo, but in person you can visibly see the difference.  The photo below shows a freshly painted swatch stick on the left, and one that was exposed to sunlight on the right.

Gelish Cinderella Collection - Party at the Palace - swatch by Chickettes.comMy Carriage Awaits is a peachy coral shade with a subtle shimmer.  This is a pretty unique color in the Gelish line.

Gelish Cinderella Collection - My Carriage Awaits - swatch by Chickettes.comHere is a side-by-side comparison of My Carriage Awaits with some other peach and coral shades.

Gelish Cinderella Collection - My Carriage Awaits - swatch by Chickettes.comElla of a Girl is a medium pink cream… love the creative play on the name.  This shade is available in a Two-of-a-Kind set with a matching Morgan Taylor shade.

Gelish Cinderella Collection - Ella of a Girl - swatch by Chickettes.comHere it is next to some other light & medium pink shades.  Unfortunately many of my swatch sticks are old and most are now faded, so the comparison photo below isn’t a very accurate depiction of the colors when they are first applied.  The light pinks definitely have a fading issue.

Gelish Cinderella Collection - Ella of a Girl - swatch by Chickettes.comElla of a Girl also fades to a lighter shade of pink with exposure to the sunlight as you can see in the photo below.  The swatch stick on the left is freshly painted, and the stick on the right was exposed to the sunlight.

Gelish Cinderella Collection - Ella of a Girl - swatch by Chickettes.comWatch Your Step, Sister! is a dark pink cream that leans a bit coral.  I’m really crazy about this color for spring and summer.  This color is available in a Two-of-a-Kind set with a matching Morgan Taylor shade.

Gelish Cinderella Collection - Watch Your Step, Sister! - swatch by Chickettes.comBelow is the comparison photo of this color.  It’s very similar to Gelish Passion.

Gelish Cinderella Collection - Watch Your Step, Sister! - swatch by Chickettes.comIf the Slipper Fits is a silvery blue shimmer polish with holographic glitter.  This is a very unique shade to the Gelish line.  The base is pretty sheer, but it also builds up to opacity though you can still see some VNL after three coats.

Gelish Cinderella Collection - If the Slipper Fits - swatch by Chickettes.comI didn’t have anything to compare this color to, but I wanted to show it next to some silvers so that you can really see the blue tones.  When I had it on alone it looked very silvery, but when you put it next to greys and silvers it most definitely has a blue-ish hue.

Gelish Cinderella Collection - If the Slipper Fits - swatch by Chickettes.comLive Like There’s No Midnight is dark blue with a shimmer finish.  It’s really lovely and sparkly.

Gelish Cinderella Collection - Live Like There's No Midnight - swatch by Chickettes.comLive Like There’s No Midnight looks very similar to Caution, but it’s more shimmery and has more dimension than Caution.

Gelish Cinderella Collection - Live Like There's No Midnight - swatch by Chickettes.com

That concludes the six colors, and next at the three TRENDS! The Trends can be purchased in a three piece set or separately.

Stepsisters Rule! is a dark pink Gelish Trends glitter topper mix that has some holographic glitters.  I think this one is really nice when worn on it’s own like this.  In general, I like how most of the Trends toppers look over a natural nail vs over a color.

Gelish Cinderella Collection - Stepsisters Rule! - swatch by Chickettes.comI applied one coat of Stepsisters Rule! over white, black, and the two pink shades from this collection… Ella of a Girl and Watch Your Step, Sister.  I didn’t realize that my black base only had one coat and is a little streaky until I was editing photos.

Gelish Cinderella Collection - Stepsisters Rule! - swatch by Chickettes.comHere is a photo of some other pink/red Gelish Trends & glitter toppers.  Shattered Beauty is a fairly close comparison to Stepsisters Rule!

Gelish Cinderella Collection - Stepsisters Rule! - swatch by Chickettes.com

I’ll Make it Fit is a Gelish Trends glitter topper with a multicolor glitter mix.  These glitters seem to take on some jewel tones.  This is also really pretty when worn alone.

Gelish Cinderella Collection - I'll Make It Fit - swatch by Chickettes.comIn the photo below I have applied one coat of I’ll Make it Fit over white, black and the two blue shades from this collection.

Gelish Cinderella Collection - I'll Make It Fit - swatch by Chickettes.comThere are a couple of other Gelish Trends that look similar to I’ll Make It Fit… Rays of Sunlight is probably the closest.Gelish Cinderella Collection - I'll Make It Fit - swatch by Chickettes.com

A Moment of Magic is the third Gelish Trends glitter topper.   This one has a golden/yellow-tinted base and has yellow, white and a few pink glitter hexes in it in addition to some gold microglitter.  The base looks very yellow in the bottle, but seems to lighten after curing.  Again, I like how this color looks on it’s own without a base color underneath.

Gelish Cinderella Collection - A Moment of Magic - swatch by Chickettes.comIn the photo below, I applied A Moment of Magic over white and black.  I don’t care for this shade over dark colors at all, but it might look nice applied over a yellow or gold base.  I was exhausted by the time I got to this swatch and didn’t make the effort to pull out other colors to try it over. These swatch posts take a LONG time!  LOL

Gelish Cinderella Collection - A Moment of Magic - swatch by Chickettes.comHere is a comparison shot of some other gold glitters.  A Moment of Magic is pretty unique.

Gelish Cinderella Collection - A Moment of Magic - swatch by Chickettes.com

Gelish MINI colors can be purchased at Sally Beauty Supply online at www.sallybeauty.com, or in retail stores. You can also purchase directly from the Gelish MINI website at www.getgelished.com!

Whew, that was a long post!  Don’t expect anything else from me this week!  Just kidding (or am I?)!  LOL

So, which colors from this collection are your favorites?


Daisy Duo Gel Polish Swatches

$
0
0

Daisy Duo Gel Polish Swatches by Chickettes.comI have a few Daisy gel polish swatches today.  These Daisy Duo sets come with a gel polish and a matching regular nail polish (RNP), and they can be purchased at Esther’s Nail Center.  I selected three colors that I thought would be fun for spring, which is wishful thinking since we’re currently buried under a foot or more of snow here!  I gave all of the colors a really good shake with my Robart before applying them.  These aren’t brand new shades in the Daisy line, so I wanted to make sure they were well mixed.  This is always a good idea for the best application results.

First Impression is a very pale lavender shade.  I applied three coats in this swatch because it still seemed a little spotty after two coats.   This color didn’t match up completely with the accompanying RNP – it’s more pale in comparison.  The RNP version has more of a lavender tone, which I like a little better and was hoping for with the gel.  It’s still a lovely shade though.

Daisy Duo First Impression Swatch by Chickettes.comFiery Flamingo is a really medium-to-dark pink shade.  This one is really fun for summer, and I love the name… it’s very suiting.  It seemed a little thick and could have benefited from a couple drops of gel polish thinner to make the consistency a little smoother.  This is also three coats.

Daisy Duo Fiery Flamingo Swatch by Chickettes.comFuchsia Star is a dense glitter polish in a clear base.   This swatch is only two coats.  I was surprised at how great the coverage was because I have previously swatched some similar Daisy glitter gels and didn’t get much glitter out of the bottle.  I think they probably needed a really good shake like this one got.  The base was a little thick, but that helps with getting consistent glitter coverage on the nail.  I love the color mix in the glitter – it’s primarily pink, but you can see little pops of blue and some holo glitters.  It’s very sparkly in person!

Daisy Duo Fuchsia Star Swatch by Chickettes.comThis is just a quick side-by-side shot of the swatch sticks that compares the gel polish colors to the accompanying regular nail polish shades.  The top two are pretty close, but the lavender shade is a bit off as I mentioned.

Daisy Duo Swatches by Chickettes.comThe Daisy Duo sets retail for $12.95 at Esther’s Nail Center.  That’s a great price point for a two-in-one set!  What do you think of these colors?

Valentine’s Day Nail Art – Ink & Hearts

$
0
0

This Valentine’s Day design is a little different from the norm, but I’m totally loving it.  I received a few different loose glitter baggies from Girly Bits Cosmetics recently, and I knew the red matte heart glitter and the .008 Fire Red Glitter would pair well.  I’ve also recently been hearing all the rage about alcohol ink techniques and have been dying to try it, so I combined these things all into one look.

Chickettes.com Valentine's Day Nail art using glitter & Sharpie markers!I started with the black and white base colors, Pink Gellac Soft White and Beautiful Black. (SAVE $5 when you spend $35 or more on Pink Gellac at Chickettes Boutique this month! Use coupon code “LOVE5″.)  I burnished the .008 Fire Red Glitter into the tacky layer of the black polish to create a gradient effect.  You can learn how to do a glitter gradient by watching the video that I created here.

On the white nails, I randomly placed the red heart glitters onto the white nails while the top layer was still wet, and then cured the layer.  My nails are very curvy so some edges of the glitter did stick up a bit.  I applied a layer of top coat over the hearts and filled in the gaps around the glitter pieces.  After curing the top coat, I wiped off the tacky residue and began playing with inks to create the smokey look.  I’m not sure if you’ve heard about the alcohol ink technique yet… it’s pretty new to me, but it’s been all the rage in several of the groups that I belong to.  I don’t know where it originated, but I first learned about it from Kim at Ten Little Canvases.  You can create some really awesome looking marble and granite textures with this technique.  See Kim’s video on it here.  And I also found this video helpful.

Chickettes.com Valentine's Day Nail art using glitter & Sharpie markers!

I purchased some Adirondack Alcohol Inks recently, but I haven’t had time to play with them yet.  For this mani, I tried a similar technique that someone else suggested, which is to use a Sharpie marker instead of the alcohol ink!  So I scribbled over the top coat with a black sharpie marker and then dipped a small brush into isopropyl alcohol and randomly dabbed it over the ink.  It turned out pretty cool, but I definitely want to practice this technique some more.  Sharpies are a heck of a lot cheaper than the inks, but I’ll let you know what works better once I’ve had time to play with the inks.

CND Shellac Flora & Fauna Collection Swatches

$
0
0

CND Shellac Flora & Fauna Collection - swatches by Chickettes.comI purchased the new Spring 2015 collection from CND Shellac called Flora & Fauna.  This collection consists of six pale pastel shades.  I love vibrant and bold colors so this collection didn’t overly excite me initially, but sometimes it’s nice to wear a soft pastel or a neutral shade.  I’m going to try to swatch the new CND collections as they come out since I know that many of you love this brand and use it loyally.  This is the brand that we work with at the Brown Aveda Institute as well, so I’ll be using it much more regularly in the coming months.

Salmon Run is pale peach with a cream finish.  I ended up applying three coats of this color because it was a little streaky looking after two.  This is the lightest peach shade that I own.  The closest color in comparison is ibd Sundance, but the CND shade is more vibrant.

CND Shellac Salmon Run - swatch by Chickettes.com

Dandelion is a light neutral shade with a shimmery finish.  It’s unlike any other neutrals that I own since most of them lean toward more of a brown-ish shade of tan, but Dandelion has a very peachy tone.  It has great coverage in two coats.

CND Shellac Dandelion - swatch by Chickettes.com

Fragrant Freesia is a light pink with a textured-looking shimmer finish.  The consistency of this polish was a little different than the others.  It was almost a little chunky.  I think this polish may have small bits of flakies in it that create the shimmer effect.  You can actually kind of see small bits in the polish when you look closely.   It’s lovely once applied, and has decent coverage in just two coats.  The shade reminds me a little of Gelish Light Elegance.

CND Shellac Fragrant Freesia - swatch by Chickettes.comCreekside is a pale pastel blue with a cream finish.  This is the palest blue that I own.  It’s closest to Gelish My One Blue Love, but is a cooler tone of blue.  This color also seemed to look a little streaky with just two coats, so I applied three for full coverage.

CND Shellac Creekside - swatch by Chickettes.comField Fox is a light, mauve-y neutral shade with a cream finish.  I didn’t think I was going to like this color, but I actually love it.  It’s a great neutral shade for my skintone.  It reminds me a little of Pink Gellac Naked, but is lighter and slightly less mauve-y.  This swatch is two coats.

CND Shellac Field Fox - swatch by Chickettes.comWild Moss is another unique shade. It’s grey with green undertones and a gorgeous shimmery finish.  This color had the best consistency of all six, and applied like a dream.  The swatch below is two coats.

CND Shellac Wild Moss - swatch by Chickettes.comWild Moss and Field Fox are my two favorite shades from this collection.  What do you think?  Any favorites?  Will you, or did you buy this collection or any of the colors?

As a reminder, Chickettes swatches may not be used to sell products online without permission and licensing. Details.

Review of Swatch Strips by The Painted Nail

$
0
0

swatch-stripsI purchased some Swatch Strips from The Painted Nail to try out (available for purchase at Everything Nailz).  I demoed these last summer while attending a party in Vegas that was hosted by The Painted Nail.  Swatch Strips are clear strips with an adhesive backing that you stick onto your nails and then paint over.  The package says you can wear the strips under regular nail polish, gel polish, acrylic, etc.  When you are ready to change your nails up, you just peel off the strip and start over… no soaking required.  It also says that the strips will last up to two weeks, so naturally I was curious to see how these would hold up with a gel manicure.

Here is a photo of the packaging, front and back. The back side has directions.  You can click on the image for a larger view.

swatch-strips-packaging

Application

The Swatch Strips are pretty easy to apply.  You prep and cleanse your nails and then choose a swatch strip that fits the size of your nails.  You peel the strip off of the sheet and press it onto your nail while gently pulling on the top of the strip to stretch it slightly.  You crease the strip at the tip of your nail and file off the excess.  If you’ve ever used nail wraps, it’s a very similar process.  I had much more success applying these than any wrap I’ve ever tried.  I didn’t get many bubbles, lumps, wrinkles, etc.  They went on nice and smooth and adhered very well.  The whole application process only took a few minutes.

swatch-strips-application

My nails are actually pretty narrow and small, so I used the 5 smallest size strips that were on the sheet… there are 8 different sizes total.  Some of them were slightly too big and had to trim them a touch.  The three larger sizes are way too big for any of my nails or my thumbnail, so they can only be used if I take the time to cut them down to size which I have no desire to do.  I could get 4 full manicures out of the package of 64 strips, and a couple more if I size down the larger strips.

Also, when looking at the sheet of swatch strips, because they’re clear and the sheet is clear, it’s impossible to tell which ones have been used already and how many strips are still available on the sheet.   It’s very hard to tell by touch also.  The only way I could find unused strips was just by trying to peel them off of the sheet.  Below is a picture of a sheet that I used.  Can you tell which ones are used, because I can’t?  You can also see how little my thumbnail is in comparison to the larger strip sizes here.

swatch-strips-one-strip

Wear

My first wear test was rather unsuccessful.  I painted the gel polish right onto the strip without a base coat.  Over the course of a couple of days, the polish popped off of every single nail in a whole sheet. I keep reapplying with different brands to see if any brand would stick, but they all reacted the same way.  I tried Kiara Sky, Gelish, Pink Gellac and ibd.  Then I thought… what would happen if I used a base coat?

Aha!!  The base coat was the answer to my problem.  On my next test I applied all Gelish products – base, color (Plum & Done) and top coat.   Below is what my nails looked like after applying a fresh set of swatch strips and Gelish Plum & Done.  They looked pretty good.  There are a couple of spots where the swatch strip was bubbled out slightly, but all in all they looked decent.  I did cap the tips of my nails, but I was essentially capping my natural nail since the strips were filed off at the tip.

swatch-strips-after-applicationI wore this manicure for 7 days and the polish stayed in place this time, as did the swatch strips to my surprise.  I thought they’d start lifting after a few showers, but they really do adhere to your nails very well and they don’t come off until you peel them off.  After a week the tips of my nails looked a little worn, but I felt pretty confident that the strips were still strongly in place and would have lasted a while longer yet.  I opted to take them off so I could move onto my next product test.  :)  Here’s how they looked after a week (I didn’t remember to take the pic on the same background).

swatch-strips-one-week

Removal

The removal process was also very easy.  Starting at the base of my nails, I lifted a corner and slowly peeled them off.  They were stuck pretty good, but they came off ok. I had quite a bit of sticky residue left on my nails, but that came right off with some polish remover and a lint-free wipe.  Below is a picture of what my nails looked like right after taking the strips off.  Note that this is NOT DAMAGE, it is sticky residue.

swatch-strips-removal

Thoughts

I am pretty impressed with the swatch strips.  I only tried it with gel polish so far, but it says you can use the strips under acrylic as well, so I may have to test that out once I hit that chapter in nail school. This is a great option for people that have difficulty soaking off gel polish, and it’s also great for people that want to change their gel polish somewhat frequently.  They cost  $12.95 per pack (64 strips) or you can buy 3 packs for $34.95.   You will only get about 4 full manicures out of a pack, so the price seems a little steep to me.

Dashing Diva also has a very similar product called Nail Guards.  I also tried these while I was in Vegas.  The concept is the same, it’s a clear guard that sticks to your nails that you can polish over and then peel off when you’re done.  The major difference between the two is that the Nail Guards are a little easier to apply because they have a white tab that lets you hold onto the tip while you’re placing it on the nail.  I haven’t done an official wear test on this brand and I don’t know the pricing, but thought it was worth mentioning.

Stuck On Love Nail Shields & Pink Gellac Glitter Effect Sprays

$
0
0

Nail art using Stuck On Love nail shields and Pink Gellac glitter spray!  Chickettes.com

I had a little play time with some new products and created this nail art look.  Girly Bits Cosmetics sent me some Stuck on Love nail shields that have a pattern that looks a little like fishnet.  The nail shields have a sticky adhesive on the back and you stick them onto your nail and polish over them to create a pattern.  You can use them with regular polish or gel.  These nail shields will be available on the Girly Bits website on Monday, February 16th (read the press release here).

To get this look, I started by painting my nails with my base colors (gel polish of course).  The shimmery coral color on my index finger, thumb and pinky is Kiara Sky Cocoa Coral, and I used Pink Gellac Beautiful Black on the other nails.  On the two black nails, I wiped off the tacky layer and then applied the nail shield to the nails.  The nail shields are very large, so I was able to cut one in half and use it on both nails.

Nail art using Stuck On Love nail shields and Pink Gellac glitter spray!  Chickettes.com

Next, I applied a coat of Pink Gellac Beautiful Black gel polish over top of the nail shield.

Nail art using Stuck On Love nail shields and Pink Gellac glitter spray!  Chickettes.com

While the black polish was still wet, I sprayed gold glitter over the nails and peeled off the nail vinyl.   Then I cured the nails in my LED lamp as usual for 30 seconds.

Nail art using Stuck On Love nail shields and Pink Gellac glitter spray!  Chickettes.com

Lastly, I cleaned off the excess glitter and top coated!

I used my new Pink Gellac Glitter Effect Spray to get this look.  This is a brand new product that is now available at Chickettes BoutiqueSave $5 on orders over $35 this month with coupon code LOVE5!  They are clear plastic bottles with a pump spray nozzle, filled with 25 grams of loose microglitter.  The glitter sprays are available in gold, holographic silver, pink and red.  The sprays allow you to add a glitter effect to your gel polish manicure by spraying the glitter onto the nail while the gel polish is still wet (before curing).  After adding the glitter, you cure the polish as normal and then apply your top coat.

I find that the bottles spray a pretty generous amount of glitter.  To get this look I think I sprayed each nail 2 or 3 times to ensure full coverage and to completely fill in the pattern.  The glitter sprays are a little hard to explain in words, so I will be preparing a video demo soon!

Nail art using Stuck On Love nail shields and Pink Gellac glitter spray!  Chickettes.com

This is the completed look! :)

Nail art using Stuck On Love nail shields and Pink Gellac glitter spray!  Chickettes.com

Nail School Update: Weeks 1-3

$
0
0

nail-school-update-weeks1-3

As some of you may already know, I enrolled in the Managing Manicure program at the Brown Aveda Institute in Mentor, OH.  It’s a part-time evening and weekend program that lasts 22 weeks, so I attend the program on Wednesday and Thursday evenings from 5:30-9pm, and Saturdays from 9am-5pm.  The timing allows me to still work and earn a living while advancing my nail knowledge.  I’ve always loved the experience at the local Ladies & Gentlemen Salon & Spa, which is a local Aveda spa owned by Nancy and Ed Brown.  They also own and operate the Brown Aveda Institute, so this seemed like a great fit.

The first week started off a little slow since the first two evenings were devoted entirely to orientation.  I enjoyed hearing the history about the school and the owners and how it all came to be.  The owners of the Institute came in and told us their personal backgrounds and stories which was really interesting.  It also felt very personal and I was impressed to learn that they do this for every new class that starts.

That Saturday was our first day in class and the learning process began!  I have to tell you that I was afraid of being really bored in this program, but I’ve already learned SO much in a very short period of time.  My other worry was that I’d be the old lady in the class and would be surrounded by kids and drama… thankfully that’s also not the case.  Our class is small and has just seven people, and we’re a pretty mature group.  Most of us have kids and/or are starting a second career.  Our instructor is also great, so I’m thankful all around to have a learning environment that is comfortable and positive.

Our program starts off in the classroom and is very heavy on book work.  We’ve already covered several chapters:

  • Personal Development; This was pretty common sense stuff about how to take care of yourself… healthy mind & body, effective communication, ethics, relationships, etc.
  • Salon Ecology; Microbiology (bacteria, viruses, infection, etc), infection control (sanitation, disinfection, sterilization), and safety.
  • Anatomy; This was a pretty long chapter that covered a lot of ground, from cells to body systems.  We learned about all parts of the body but the chapter had a strong focus on the anatomy of the arms & hands, and legs & feet for obvious reasons.
  • Nail and Skin Physiology; Composition of the nail and all of the nail and skin disorders and diseases.  This chapter had a LOT of vocabulary, and we had very little time to take it all in before the test was given.  I stayed up late studying the night before the exam and luckily aced it.  Thank god for multiple choice tests!
  • Nail Services & Natural Nails:  We just started these two chapters and will finish them up in the coming week.

Since it’s an Aveda school, we’re also learning about the company and their rituals.  As I mentioned above, I’ve visited one of our local Aveda spas many times and have always loved the service that I received, so it’s interesting to learn this side of things.  They’re extremely customer service oriented and they want every customer to have an exceptional experience from the second they walk in the door, until they walk back out.  We also learn about the Aveda product lines.  I love, love, love the smell of their products!  I didn’t even realize beforehand that their products are all plant-based and organic, and that they can actually trace most of the ingredients used directly back to the farm where they were sourced.

I also love that the Ladies & Gentlemen locations are non-tipping.  I don’t remember if that is an Aveda thing or if it’s just specific to these locations, but as a customer is takes the pressure off.  I never know how much to tip.  And as the professional that’s performing the service, you know exactly what you will earn on that service and your income isn’t dependent on tips.  The purpose of it really though is to ensure that every customer receives the same exact level of service, and there is no favoritism played depending on how much a person tips.

So as I mentioned, the first few weeks are very book heavy.  Next Saturday we do a mani and pedi on a live model that we bring to class, and the following week we do a Shellac mani and a regular pedi on another live model.  My mom and sister have volunteered to be my models.  The second live model demo is actually a test, and if we pass we graduate to the next level and get to work on clients on the floor.  The next phase has much more hands-on experience and only one day a week in the classroom.  And then our final phase is the management course, and that’s more classroom-oriented again.

kitI’ve always wondered what comes in the manicure kits… now I know!  Above is a picture that I took the night I received my kit.  I swear we were all like little kids in a candy store the day we got them!  I think our kits are different from the ones that most schools give out – I hear that most receive the OPI kit.  Ours is hand-crafted for our course needs.  The implements are all really good quality, which I’m happy about.  We don’t receive much in the way of product since the Aveda products are all provided for us at the school.  We use Zoya nail polish, so our kit included a Zoya color (red for State Board), base, top and remover.  The remover isn’t shown in the picture since it was on backorder.

I’ve only used my fake hand once so far.  We put tips on them in class and practiced filing and polishing.  I forgot to take a picture of the first set that I did – it was just a super simple mani with a solid color.  I did some rounded tips that looked way too wide for the hand.  Below is a picture of my second attempt.  I rounded the tips a little better, though round nails are still out of my comfort zone.  I really want to learn how to work with other shapes so I’ll be practicing on that.  This mani was a simple purple and gold using CND Vinylux – that’s the other RNP brand we use occasionally besides Zoya.  (I don’t remember the color names!)

fake-hand-2nd-manicureToday (I’m writing this on Saturday evening) our instructor did a demo of an Aveda manicure from start to finish and we got to practice on each other, so I did my first manicure on a live person.  I probably sound like a broken record, but I love the Aveda rituals… the manicures include the hot towels and hand & arm massage.  Ahhh…. so relaxing.

I have to say though, there are some major redundancies in the process that we learned today that are annoying as hell.  I think we have to do these things because of State Board, but OMG it’s frustrating.  We have to keep little Ziplock bags for all of our porous items like files/buffers, cotton and paper towels.  We have to keep all of these items in the bags sealed at all times, and every single time you go to take an item out of the bag you have to spray your hands with sanitizer.  I think I had to spray my hands about 50 times, no joke.  I don’t understand why I can’t sanitize my area and then lay the items that I need on a sanitized area for use during manicure.  I’ve never seen anyone in a salon doing it this way.  If I sat down to get my nails done and the tech kept spraying his/her hands, I’d be annoyed.  I think it takes away from the experience.  Just saying… that part sucks!

I’m pretty good at polishing… as you know, I’ve had some practice.  LOL  But I was terrified about filing and nipping cuticles on someone else.  I think I did ok though.  Jessica, my classmate, was very helpful in telling me how I was doing.  I started off a little too gentle and she told me it was ok to use a little more force, which helped make me feel more comfortable with the process.  Here’s a picture of her completed mani.  The color she chose was Zoya Layla, a gorgeous pink.

1st-manicure-jessicaThe first three weeks have flown by!  I’m going to try to post regular updates about my experience, though I likely won’t post about it every week… maybe every 2-3 weeks.

Happy Belated Valentine’s Day too!  I really wanted to do more nail art for the holiday, but I’ve been a little busy  ;)

Girly Bits Cosmetics Nail Lacquer Swatches

$
0
0

Girly Bits Cosmetics Nail Lacquer Swatches
Today’s post is a bit out of the norm for me… I have some swatches of Girly Bits Cosmetic polishes, which are regular nail lacquer and NOT gel (gasp!).  It’s been a long time since I’ve used a regular nail lacquer on my nails. It always makes me appreciate all of the ladies that swatch and do nail art with regular polish because I find it more difficult than gel. I’m used to the instant hardness of gel, so I always manage to bump or smudge my nails when using lacquer. LOL

Girly Bits Cosmetics is a Canadian indie nail polish brand with some really beautiful colors and finishes. I love all of the gorgeous holographic polishes! Below is one of the holo beauties called Winter Sanctuary. This is a new shade that was just released yesterday. It’s a medium cobalt blue with scattered holographic microglitter.  My photo is slightly blurry, but I chose this shot because it shows off some of the holographic shimmer effects.

Girly Bits Winter SanctuaryFathomless is a dark, blackened green base with blue/green microglitters.  I think my photos make the base look very dark black, but there is a slight greenish tone to it.

Girly Bits FathomlessCosmic Ocean is a blue/green duochrome shimmer topper.  I applied one coat of this color over black (Pink Gellac Beautiful Black) and blue (ibd Swag Bag).  Over black it seemed to take on more greenish tones, and over blue it picked up more blue/teal tones.

Girly Bits Cosmic OceanCheck out all of Girly Bits new releases here.  They just released some new colors, including Winter Sanctuary, as well as some Nail Vinyls and Stuck on Love nail shields.  I just did some nail art recently with the fish scale nail shields (see it here).


NEW! Pink Gellac Glitter Effect Sprays & Matte Top Coat

$
0
0

Pink Gellac Glitter Effect Sprays & Matte Gel Top Coat available at Chickettes Boutique

There are some new products available at Chickettes Boutique that I’m pretty excited about! First is the Pink Gellac Matte Top Coat, which is a gel top coat with a matte effect that you can apply over any color. It’s also fun to apply over different finishes and even glitter effects for a different look.  Below is a photo of Matte Top Coat applied over Pink Gellac Beautiful Black.

Pink Gellac Matte Gel Top Coat available at Chickettes BoutiqueIf you’ve ever used a matte top coat, you’ve probably noticed that after a period of time they start to appear glossy.  This is usually caused by the oils from lotions or skin care products, or even the natural oils from your skin.  When I wear a matte top coat I tend to touch my nails a lot, which makes them appear shiny after a while.  When this happens, all you have to do is cleanse the surface of your nails with alcohol or an alcohol-based nail cleanser and they will go back to looking matte again once they are dry.  :)

Chickettes Boutique now carries three of the Pink Gellac top coats, and I put them together in a side-by-side photo for comparison purposes.  Ultra Shine and Ultra Shine PEARL are high-gloss, no-wipe top coats that require a 60 second LED cure (36 watt lamp).  The Matte top coat has a 30 second LED cure, and does have a tacky inhibition layer that needs to be wiped off.  The matte effect will appear after the nails have been properly cleansed and then air dried for a few seconds.

Pink Gellac Gel Polish Top Coats available at Chickettes BoutiqueThe other new products that I’m excited about are the Pink Gellac Glitter Effect Sprays.  They are plastic spray bottles with a pump nozzle that spray loose microglitter to create glitter effects!  Each bottle contains 25 grams of loose glitter, and there are four colors available… Red, Pink, Gold & Holographic Silver.

To use the glitter sprays with gel polish, apply your desired base color and on the last coat, spray the glitter onto your nails while the color layer is still wet (before curing).  Hold the glitter spray approximately 10 inches above your nails and spray the desired amount.  Cure the polish in your lamp as directed on the polish bottle.  Lastly, apply your top coat over the glitter layer.  If you apply a LOT of glitter, you may need two layers of top coat to get a completely smooth finish.

Pink Gellac Glitter Effect Sprays available at Chickettes Boutique

I’ve been playing with these glitter sprays and have found that you can spray a little or a lot to get the desired effect.  If you purchase these glitters, I recommend playing with them before trying to apply the glitter to your nails so that you are comfortable with the spray pump to spray the proper amount.  When I first tried them I was doing a full pump of the nozzle and it was spraying out quite a lot of glitter.  I found that you can pump the nozzle very lightly to get a sprinkling of glitter instead of a full blast of glitter.  :)  I also recommend working over a towel or paper towel for easy cleanup of excess glitter.

Below are some examples that I prepared on swatch sticks.  You can click on this image to see a larger version.

Pink Gellac Glitter Effect Sprays available at Chickettes BoutiqueThis is a closer look at the spray pump nozzle in case you’re curious.  I hadn’t seen loose glitter in a spray bottle before now, and I think it’s pretty genius.  It provides a lot of new possibilities for nail art, as well as things like arts and crafts!

Pink Gellac Glitter Effect Sprays available at Chickettes BoutiqueBelow are some examples of nail art looks that you can create using gel polish, Nail Vinyls and the glitter sprays.  I started with my base color, Beautiful Black and wiped off the tacky layer.  Then I applied the Nail Vinyl stickers to the nails and painted another coat of Beautiful Black over the areas where I wanted to add some glitter effects.  I sprayed the glitter onto the nails while the polish was still wet, and then peeled off the stickers before curing.  You can see in step 3 that I had a little bit of loose glitter on the bottom of the swatch sticks where I didn’t want it.   I just cleaned that loose glitter off with a cotton swab before applying my top coat.

Another quick trick… if you get loose glitter on your top coat brush, wipe it off with a lint-free wipe and alcohol or nail cleanser before putting the brush back in your bottle!  Glitter can get messy if you’re not careful.  :)

Nail Art using Pink Gellac Glitter Effect Sprays & Nail VinylsThis is another nail art look that I created and wrote about recently using the glitter sprays.  Read the full article here.

vinyls-and-glitter-stepsThe Pink Gellac Matte Top Coat and Glitter Effect Sprays are available for sale at Chickettes Boutique!

Save $5 on orders of $35 or more using coupon code LOVE5 until the end of February!

The Boutique now also accepts credit cards in addition to PayPal  :)

MelodySusie Gel Polish Starter Kit Review

$
0
0

melody-susie-gel-polish-starter-kit-review
MelodySusie released a new gel polish starter kit that includes an LED lamp and all of the essentials needed to do a basic gel polish manicure… and some extra goodies for nail art too.  I have reviewed a few of their nail lamps and was really impressed by some of them, so I was looking forward to trying out this kit.  The kit arrived in a very sturdy box, and this is what the packaging looked like on the inside when I took the lid off:

ms-starter-kit-packaging

Everything was packaged really well. I pulled out the lamp and the polishes to find some compartments below that had little individually wrapped goodies. There were nail care tools and some nail art goodies that I wasn’t expecting. There was a lot more in that box than I imagined! Here is a shot that shows ALL of the items that are included in the kit.

ms-starter-kit-contents

Included in the kit are:

  • 3 gel polish colors
  • gel polish top coat
  • 6-watt LED lamp (4 fingers)
  • cuticle nippers
  • cuticle pusher
  • orangewood stick
  • toe separators
  • 2 nail files
  • buffer
  • nail brush
  • 3 rolls of nail art striping tape
  • a wheel containing different colored rhinestones
  • a pot of loose glitter (red)
  • and 2 sheets of nail decals (one for french tips, and one decorative)

I was impressed with the contents of the kit and was eager to do a manicure and try it out.

Application

I conducted a wear test with the #1 blue polish (the polishes don’t have names, they are numbered).  You can choose from two different color selections when you purchase a kit.  I thought the blue color was really pretty, so I went with that first.  The polish bottle says “3-in-1″ on it, so at first I thought it was a one-step gel, but after reading the instructions I realized that it needed a top coat, so it’s really a 2-step since no base is required.  The top coat bottle that’s included in the kit also looks exactly like the other bottles, so that added a little to my confusion, but I quickly figured out that bottle #4 was the top coat.

I prepped my nails by shaping, buffing and cleansing with alcohol and then applied two coats of the blue polish directly onto my nails.  The application was ok, but I did get some shrinkage at the tips and had to do a bit of flash curing to hold the polish in place.

ms-mini-travel-lamp

The LED lamp that’s included in the kit is a 4-finger lamp, so the thumb has to be cured separately.  The lamp will cure for 45 seconds by pressing the button once, or it will cure for 60 seconds by pushing the button two times consecutively.  The lamp automatically turns off when the time is up.  The instructions said to cure the first coat of polish for 45 seconds, and the second coat for 60.  The top coat also required a 60 second cure.  The picture above is a quick demo shot of the lamp in use (no polish on my nails).  I had to turn my hand slightly to get all four fingers under the lamp at once.

The top coat didn’t have a tacky layer once it was cured, so it’s a no-wipe top coat.  I wasn’t expecting that and it was a pleasant surprise.  Below is what my nails looked like after completing the application… nice and shiny and I love the dynamic shimmer effects of this blue polish!

ms-wear-day1

Wear

So how did the polish hold up??  It held up great – not a single chip in the 10 days that I had it on.  Unfortunately though, the top coat went dull really quickly.  It was dull after just one or two days and stayed that way for the duration.  Below is a picture of what my nails looked like after 10 days of wear.  You can see there is some tip wear, and the top coat is very dull, but the polish is holding on.

ms-wear-day10

Removal

After 10 days I was pretty confident that this polish wasn’t going to chip or peel any time soon, so I decided to test removal.  I took a coarse nail file to the top layer and roughed them up, and then I started the removal process.  First I tried using my new Steam Off gadget since it seems to be working pretty well for me.  I soaked for the full 10 minutes, but the polish didn’t budge a bit.  In fact, the C-curve of my nails started to curl really bad to the point where it almost hurt.  Well that was strange… So then I decided to switch over to my NailMates to soak.  After another 10 minutes the polish around the edges just barely started to budge.  So I did a little scraping, a little soaking, a little scraping, a little soaking, etc… for an HOUR!!  Yes, an hour.  This stuff was not coming off, and I even applied heat with my warming mitts for 20 minutes at the end.  After a full hour of trying to soak the polish off, this is what my nails looked like.

ms-soak-off-1-hourYou can see that they were still a little curled at the tips, and the polish was just hanging on for dear life.  I think this polish would have stayed on forever if I hadn’t finally taken a buffer to them to remove the remainder.  Removal gets a huge thumbs down from me.  I wouldn’t wear this polish again without using a base that I know will soak off.

Colors

These are the three colors that were included in the kit that I received. As I mentioned, there are two different sets of colors that you can choose from when purchasing this kit. The other option looks like it includes red, black and taupe.

This is dark blue with a beautiful shimmer finish.  It seems to have some flecks of blue and purple.

ms-color-1This is a peachy shade of pink that has a golden shimmer.

ms-color-2And the last color is a medium-to-dark red with a golden shimmer.

ms-color-3The colors cannot be purchased individually, and are only available in the kit.

Summary

I’m impressed with all that the kit comes with, and the quality of the tools. It’s a fairly complete set, but doesn’t have cleanser or removal products. I like the colors, but after my removal experience I definitely think they should include a base coat for easier removal. I also prefer when polish colors have names instead of just numbers because it makes them more memorable, and the top coat bottle should be labeled as such to prevent any confusion.

If you’ve read some of my past reviews you know that I’m not a huge fan of 6-watt and/or 4-finger lamps. I personally prefer a 5-finger lamp for everyday use just to speed up the application process. For travel purposes, 4-finger lamps like this one are great though. This lamp is actually very portable and would easily fit in your luggage for a trip.

The kit is a good value for someone that’s just getting into gel polish. It retails at $79.99, and is currently on sale for $49.99 – you can barely buy four bottles of gel polish for that price.

The MelodySusie Professional Gel Polish starter kit is available for sale on Amazon.com.

LeChat La Fleur Collection – Spring 2015

$
0
0

LeChat Perfect Match La Fleur Collection - Spring 2015 - swatches by Chickettes.com

I have swatches of the new LeChat Perfect Match La Fleur Collection today! This new Spring 2015 collection consists of six bright and cheerful colors.  I don’t know about you, but I’m certainly ready for Spring and some brighter colors.  This winter has been bitter cold and snowy here in Ohio with temperatures dipping well below zero more times than I can count, and snow has covered the ground for more than 8 weeks straight.  Seeing the Spring colors coming out gives me hope that the snow will soon melt and we’ll see grass and flowers instead of this blanket of white and grey.  :)

There are three colors in this collection that have a shimmer finish, and three with a cream finish.  I found that the creams were a bit on the sheer side and were almost a jelly-like in consistency.  The coverage was pretty even, though I preferred the opacity of them with three coats instead of two.  The shimmer finishes had a little better coverage with two coats, though I did apply three coats of each color for these swatches.  I experienced some shrinkback at the tips with all of these polishes, so I flash cured them to hold the color in place.

Sweet Iris is a blue-ish purple cream.  I had a really hard time capturing this color in a photo because my camera was pulling out the blue tones.  In pure daylight it looks more purple than my swatch, but it definitely has blue qualities as well.  It reminds me a lot of Shellac Purple Purple in tone, but without the frosty shimmer finish.  It’s a unique color, and I can’t wait to wear it!

LeChat Perfect Match Sweet Iris - Spring 2015 - swatch by Chickettes.comMorning Melody is a medium blue cream.  This color is in the same family as Gelish One Cool Cat, ibd Swag Bag and Shellac Cerulean Blue.  It’s a touch cooler in tone (less teal), but they’re all very similar.

LeChat Perfect Match Morning Melody - Spring 2015 - swatch by Chickettes.comRose Glow is a very bright, almost neon, red-leaning pink with a cream finish.  This color is similar to Gelish Brights Have More Fun and Shake It Til You Samba.  This color is definitely an attention grabber and is awesome for beach wear!

LeChat Perfect Match Rose Glow - Spring 2015 - swatch by Chickettes.comOrange Blossom is medium orange with a golden shimmer.  This shade reminds me of LeChat Lollipop, but with the added shimmer.  It’s also similar to Gelish Orange Cream Dream, except that OCD has more of a frosty finish instead of the sparkly shimmer.  I’m definitely loving this color.

LeChat Perfect Match Orange Blossom - Spring 2015 - swatch by Chickettes.comPeony Passion is bright medium pink with a golden shimmer.  I compared this color with my other swatches and really can’t find anything quite like it.  I feel like it has some blue-ish undertones to it.  Most of my pinks are either red or purple-toned, and this one stands out from the crowd.

LeChat Perfect Match Peony Passion - Spring 2015 - swatch by Chickettes.comDewdrops is a bright medium green with a golden shimmer finish.  It’s close to Gelish Amazon Flirt in shade and brightness, but it has the added shimmer and better coverage.

LeChat Perfect Match Dewdrops - Spring 2015 - swatch by Chickettes.com

Be sure to visit the LeChat website to find a distributor near you! (I know I usually provide you with Amazon links to the colors, but I haven’t found this collection on there.)

Tell me which colors are your favorites in the comments below!

Freehand Nail Art Doodles Using Presto Gels

$
0
0

Chickettes.com freehand nail art using Presto art gels

I purchased some Presto art gels a while ago and finally had some time this week to play with them a little. I picked out some colors that I thought would work well together and then sat down at my nail table with no design ideas at all and just started doodling!

The base color is two coats of Madam Glam Lilac, a beautiful color with amazing coverage. I’m currently wear-testing a Madam Glam polish and will be doing a full write up with some swatches in the next week, so keep an eye out for that. I’ll just tell you now that I’m super impressed! You can save 30% on your Madam Glam order with coupon code CHICKETTES30. It looks like they have a winter sale going on right now where you can get up to 40% off!

Chickettes.com freehand nail art using Presto art gels

I picked up the Presto gel pots from Nail Labo. The colors that I used are Fresco (teal), Rigoroso (purple) and Chiarezza (silver).  They have a thick formula and don’t spread when you draw on your nails with them.  I used a fine-tipped nail art brush that one of my classmates gave me, and a small dotting tool.  I’m still fairly new to freehand art, so even this simple design took me a long time to do.  The silver polish was the easiest to work with since it didn’t seem quite as thick and brushed on really easily.  I plan to practice some more.  :)

Chickettes.com freehand nail art using Presto art gels

Revel Up2You – Create Your Own Gel Polish!

$
0
0

Revel Up2You - Create Your Own Gel Polish

Revel Nail just launched a new product called Up2You that turns any regular nail lacquer into a long-lasting gel polish! This product allows you to create a whole bottle of gel polish that can be stored and used many times. Do you have a favorite nail lacquer color that’s not available as a gel? Well this may be the perfect solution to make your own bottle of that color.

To create a gel polish you simply pour your nail lacquer right into the Up2You bottle. I believe this is a 50/50 mixture since the Up2You bottle contains 7.5ml of liquid, and you add another 7.5ml of lacquer to the bottle. You fill it up just to the bottom of the neck of the bottle. Below is a picture that demonstrates this. I actually have rather bad depth perception and it was hard for me to look into the bottle and gauge whether I should keep pouring.

Revel Up2You - Create Your Own Gel PolishAfter pouring the lacquer into the bottle it needs to be mixed.  The instructions say to close the bottle and hold it upside down for 20 seconds, then lay the bottle on its side and then slowly rotate the bottle to each side for 1 minute.  Then hold the bottle upside down and shake in a Y motion for 1 minute or until you hear the mixing balls cling together.  My arm got tired of shaking and on 2 of the 3 bottles that I mixed I never heard the mixing balls.  I ended up putting my bottles on my Robart paint shaker for a while to make sure they were good and mixed.

Once your color creation is mixed, you apply the gel polish like normal except a base coat is not needed.  You prep, cleanse, apply 2 coats of color (curing after each), and then apply your top coat (and cure again).  I haven’t conducted a wear test on Up2You, but it should last up to two weeks like a regular gel mani.  My wear test of the regular Revel gel polish was very positive.

The Up2You gel color can appear slightly diluted and not as opaque as the original lacquer color.  I made three different colors with Up2You.  The first idea actually came from one of my Instagram followers that said she wished Morgan Taylor Best Ball Gown Ever was available as a gel.  I immediately thought… it’s not, but it could be!  This is a unique color from the Morgan Taylor Cinderella collection that just came out.  Of the three colors that I mixed, this one appears much more diluted than the others.  Best Ball Gown Ever is a blurple (blue-ish purple) iridescent shimmer frost.  Here’s what it looks like as a gel polish using Up2You.

Revel Up2You - Create Your Own Gel PolishThe other two colors that I mixed were LLarowe Julia Roberts 1967 and Different Dimension Big Bang.  Julia Roberts is light green with a subtle holo shimmer.  Big Bang is a spectacular holographic glitter polish.  Both of these colors look almost exactly like the original colors after being mixed into Up2You.  Big Bang really exceeded my expectations!

Revel Up2You - Create Your Own Gel PolishThis is a side-by-side shot of the swatches of each of the three colors in their lacquer form and gel form.  In order from left to right, they are Morgan Taylor Best Ball Gown Ever, Different Dimension Big Bang and Llarowe Julia Roberts.  Best Ball Gown Ever was already a sheer color originally, so mixing it with Up2You made it even more sheer.

Revel Up2You - Create Your Own Gel Polish You could even get creative with Up2You and blend multiple colors together to create custom colors.  I love that you can save your new gel colors for future use.  Since my Morgan Taylor bottle contained 15ml of lacquer, I still have half a bottle left.  The other two lacquers that I used have smaller bottles, so there’s not much left in them to work with.  Below is a picture of the bottles after pouring out 7.5ml.  I think I would prefer to mix smaller bottles instead of a full 15ml bottle – maybe half that size.

Revel Up2You - Create Your Own Gel PolishI know many of you will wonder how this product compares with Gelibility since the concept is similar.  Gelibility also turns lacquer into gel, but you do it outside of the bottle in a paint pallet and it’s meant for immediate use and cannot be stored once mixed.  You can create multiple colors with one bottle of Gelibility since you only mix a small amount at a time.  With Revel Up2You you are only mixing one color in a bottle, but you can store it and use it many times.  I played with it a little and created some custom 50/50 blends in a paint pallet outside of the bottle and that seemed to work too.  You could use it that way, but that’s not really the intended purpose.

Revel Up2You also has a great price point at $6.49 a bottle!  You can also purchase a set of 3 bottles with a Revel top coat for $22.90, and there are a couple other bulk purchasing options.  The Revel Nail brand is putting out great quality products at prices that are extremely affordable.  Shop Up2You here!

Viewing all 441 articles
Browse latest View live


Latest Images